About the MFR


The Metaline Falls Railroad (MFR) is a proto-freelanced model railroad based on the Pend Oreille Valley Railroad located in northern Idaho and north eastern Washington State. For the very latest on the layout, please visit my YouTube channel and follow along with my Instagram account and Facebook Group.

Wednesday, November 28, 2012

Metaline Falls Revealed

Youtube user abekinney brings us this great view of the Metaline Falls revealed for the first time in 27 years as the Pend Oreille river reaches a historic low point behind the Boundry Dam.


It's fun to dig through Youtube for little gems like this while researching information on the area I've chosen to model.

If you are interested in learning more about the falls, here is a nice article about the falls from last year that is full of fantastic historical photos like the following:


Sunday, November 25, 2012

What did you do on your Thanksgiving break?

What did you do on your Thanksgiving break? I finished my staging yard.


I have been inspired over the last few days to finally get around to completing the track work for my layout. The last component being this little three-track staging yard above my work bench. The construction when pretty painlessly and was done in a couple of afternoons. While photographing the construction process, I realized that I desperately need to upgrade the lighting in my train room, but that is a project for another day.

(Note: Click the images to view them at a larger size)

The first step was to remove the decorative molding from the wall and install the brackets which would support the base. The overall length of the yard is eight feet so I spaced four brackets appropriately and added a fifth to the layout directly underneath the hole where the trackage would emerge.


I then cut 2" thick foam core to the appropriate shape and rolled on flat black latex paint to the visible sides which included top, bottom, and front edge.


After the paint had dried, I fitted the two sections to the layout ensuring that everything was clean and level.


I then measured and carefully glued  the track and cork roadbed to the foam using Elmer's white glue and held it in place with thumb tacks until the glue had dried.  I decided to lay both the track and the cork at the same time, which I find helpful in ensuring that everything is aligned correctly.

The cork may be an unnessicary step, but in my opinion track laid directly to the foam base tends to look a bit unfinished.  I like the clean, purposeful look that the cork provides.


The final step (after running wires to the track from the main bus line) was to install a couple of Caboose Industries ground throws.  I've always wanted to use these as I like the idea of throwing a switch in a manner that mimics the real thing, but I find their size to be a bit of an eyesore for realistic modeling purposes.  The staging tracks turned out to be a perfect excuse to sneak a couple on the layout!


Here is a pretty bad photo of the far end of the staging tracks.  I had created a number of these bumpers about a year ago in preparation for the yard going in so attaching them now was quick and easy!


And finally we have another terrible photo and a view of the overall view of the yard.  I'm really pleased with the look of the final product.  It looks good above my work bench and makes the rest of the layout look pretty unfinished in comparison.  I guess I've got my work cut out for me!

Learning Points:
  • Have plenty of thumbtacks on hand when laying cork and track.  This allows the process to go quickly and minimizes the amount of stopping and waiting for glue to dry before continuing on with another length of track.
  • a quick coat of paint to cover the foam base goes a long way to making a staging yard look good.  Staging may not be the focus of your model railroad, but who says it needs to look bad?
  • Doing small projects (such as assembling and painting track bumpers) as time permits helps to speed up the time investment of a build and is a great way to maintain momentum on a project.

Tuesday, November 13, 2012

Maintaining Momentum

BNSF Unit Train headed west out of Spokane Washington July 2011

So, looking back at my previous posts I see that the last major construction push on my layout was back in February of this year when I completed laying and wiring my track-work.  That was ten months ago. Progress has been terribly slow.

I knew going into this project that this would happen.  For me, model railroading is just like any one of the many other hobbies I enjoy.  It's a hobby that maintains my interest for decades, but the passion for getting my hands dirty and actually actively working on the railroad tends to ebb and flow. (Which is yet ANOTHER great reason to design and build smaller and better, not bigger and quicker.) This is my first layout in a decade and I don't want to stumble down the basement stairs a decade from now to find that my layout is in the same unfinished state that it is in currently.

For a new model railroader, getting past these dry spells in our hobby intrest can be difficult if not impossible.  Maintaing momentum can be a tricky thing especially when you feel as if you've expelled so much energy getting to this point and looking down the road, there is a long way yet to go. What can one do to maintain momentum when trying to scrub caked on plaster of paris off of one's arms is just not terribly appealing at the moment?

First know that you are not alone. I take comfort knowing that everyone goes through these periods of disinterest. For me, the endless amount of information available through blog posts, magazine articles, Youtube videos, and forum posts keeps me excited. Following along with other modelers as they shape and mold their own little railroad empires keeps me excited. Knowing that yes, my intrest in getting my hands dirty may wane from time to time, but I've got my own railroad empire waiting patiently for me in my basement. That, more than anything else, keeps me excited.

For further reading, check out this article from the May 2011 issue of the Model Railroad Hobbyist Magazine. Thanks goes to dfandrews for pointing me to it!

Monday, September 10, 2012

Installing Switch Machines

I haven't made a ton of progress over the last few months, but I have finally completed building and installing all of my switch machines, and It's been an interesting experience.


After doing some research, I decided to purchase Bullfrog turnouts from Fast Tracks. I liked the simple design of the machines and felt that the assembly process would be a good way to ease myself into the potentially tedious task of building things for the layout.

The Bullfrog turnouts themselves were easy to build thanks largely to a very good tutorial video made available on Youtube by Fast Tracks.

The Control Rod assembly however, was not easy to install. I spent quite a long time installing all eight of the machines and control rods mostly because the instructions provided with the control rods were pretty poor and they do require careful measuring and cutting to ensure that everything fits and works properly. In addition, the little laser cut wood tool provided to help screw the control rods onto the metal connector that attaches to the switch machine stripped every single time. This left me having to slowly and awkwardly twist the rods onto the machine with a pair of pliers while crouched under the layout table.

If I could suggest one thing to the fine folks at Fast Tracks, it would be to please put out a tutorial video showing how to properly install the control rods. I feel this would have likely eliminated any problem I had during the install process. Frankly, looking back on the experience, I'm not sure I installed them correctly, yet I can't think of what I did wrong and why the installation took so much time and effort.

When all is said and done, I still highly recommend the Bullfrog Manual Switch Machine system. The quality is very good, the price is even better, and they seem to perform flawlessly once installed.

Wednesday, June 20, 2012

Layout Progress Video #2

I've added a new update video that focuses on a problem I am having with electrical connectivity in a specific section of my layout.  Since recording this video I've taken a file to the inside of the frogs to shave down the plastic a bit in that section, I've also bent the switch points to help them make better contact with the rail.  My next steps will be to get the frogs powered.

Any additional thoughts about this issue you might offer will be greatly appreciated. Also, I apologies for the shakey camera in the video. I hate looking at that sort of thing myself and I'll be sure to avoid it in the future.

Tuesday, June 19, 2012

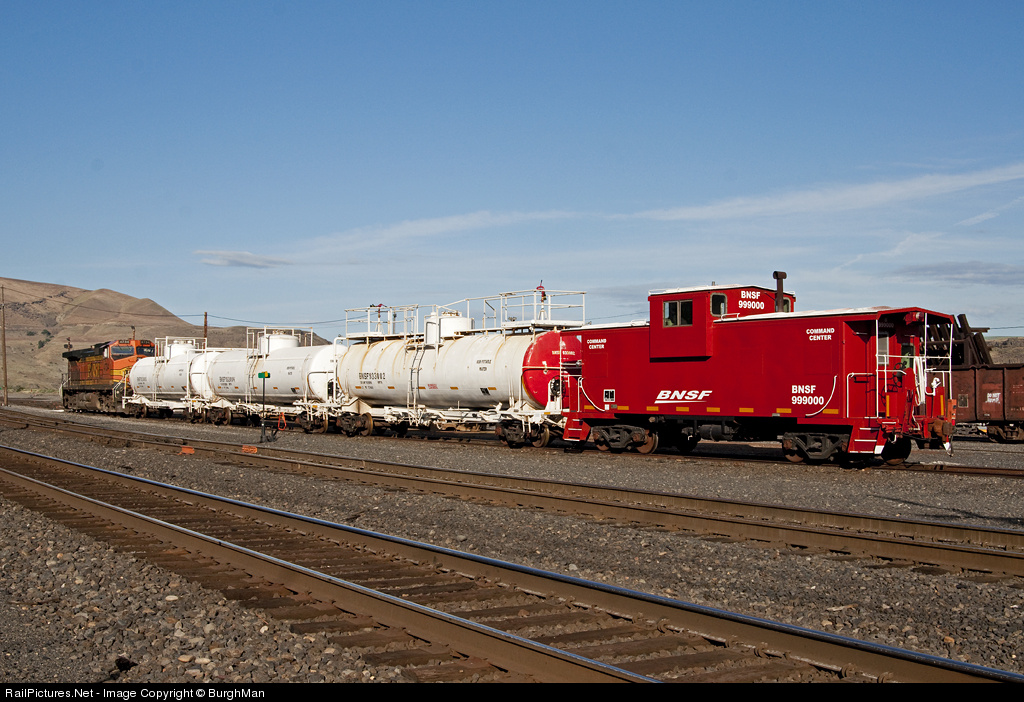
Find an excuse for that caboose!


I love the modern era. I love big, heavy engines winding their way through the mountains along rail routes that are a century old or more. I love old, rusty switchers that may have seen better days but can still be seen moving freight in elderly boxcars along tired old lines between small prairie towns. And yes, I also love the graffiti that seems to find its way on nearly every piece of rolling stock these days. What I miss about past era's of railroading though is the caboose.

Let's face it, if we are trying to emulate the modern era, we really can't justify putting a caboose on the end of our trains. It just isn't done anymore. We've just gotta learn to accept this as just one of the few downsides to modeling the modern era and move on...

...or do we? A few months back, a fellow member of Trainlife showed off some video he had taken of a daily freight train near Fort Edward NY. This is a beautiful area for watching trains and actually has quite a few unique features that really grab me and had I known about this place sooner, I'd most likely have set my railroad here instead of in Washington.

If you study the area closely in Google Maps, you'll find a small yard located just outside of Fort Edward, leading from it is a long, winding branch line which follows the river north to Glen Falls. There are several interesting industries located here who are served along stub sidings and there is no passing siding anywhere along the way to allow the locomotive to run around the cars and push them to their appropriate spots. This then requires that the cars be shoved the 5.5 miles from the yard to their destinations. This looks like a job for a caboose!

I am not entirely familiar with the details of how this works, but essentially, for safety reasons, railroads have rules that say that if a train needs to be shoved for more than a mile, a "shove car" must be used as a platform for the trainman to stand and observe the maneuver from.

For my purposes, I'll be using a caboose to assist while shoving cars back down the main line from Ione to Newport. This is actually really helpful for me because my passing siding on my layout isn't actually long enough to allow an engine to run around an entire train. The caboose also offers a lot of operational interest in that it adds an additional element to consider while switching cars and building trains.

So there you go! The perfect excuse to add a caboose to almost any modern layout!

Saturday, March 3, 2012

Layout Progress Video #1

Here is the first of what I hope to be many layout progress videos.  I hope you like it!