I read these stories with interest and took their warnings to mean that if I were to try to move my own layout one day, I'd best be sure to plan for that move from the beginning.
The very first steps I took in designing my railroad was to measure doorways and stairwells. My house was built in 1930 which means the stairwell was constructed in such a way that it essentially runs smack into a wall, thus making it impossible to carry anything larger than a basket of laundry up and down those stairs. That being said, after careful measurement I was pretty sure that if I built this layout just right, I'd be able to squeeze short modular sections up those awkward stairs.

The layout is actually two 2 x 5 foot free-standing modules bolted together in the middle. The scenery, trackwork, backdrop, everything was designed and built with the plan of simply removing two large bolts and pulling the two modules apart for transport. For the most part, that element of the design worked well. In the beginning I had assembled the trackwork carefully along that center seam using insulating joiners where the two modules met. I believe these gave the trackwork some flexibility which allowed the modules to "breath" at that joint over the years. It also allowed me to wiggle the two modules apart without causing damage to the trackwork itself. Scenery had been applied to hide the seam between modules, but a quick swipe of an Xacto knife took care of that. Dealing with the ballast laid across the seam was simple as well. pouring a bit of water mixed with a drop or two of dish soap on the ballast was all that was needed to loosen it enough to allow it to come apart safely.
Having previously removed all models and trees and with the layout now in two sections, (and the staging yard and lead tracks removed from the surrounding walls) it was time to remove the legs... This is where my original plans fell quickly apart.
Originally I had planned to simply unscrew the legs from the tabletop and transport those separately which WOULD have worked except that I had added the fascia and bullfrog turnout control rods. These rods were fished through holes drilled in the fascia as well as the leg supports. In order to access the screws to remove the legs I'd need to carefully and delicately remove those control rods before removing the fascia and supports. Folks, believe me when I tell you that installing those control rods and getting them to operate smoothly in the first place was a HUGE pain in the you-know-what. I was not about to try to carefully and delicately removing those rods only to have to re-install them again later.
So, out came the circular saw!

I cut through the each leg just below the supports and lifted the layout free. I found I also had to unscrew and remove the backdrop as well as it was now just a bit too tall with it's stubby little legs to clear the narrow stairwell. My poor little layout was now in 8 separate parts.
Transporting the disassembled layout to it's new home 30 minutes away in a borrowed van was very easy and took only two trips. I was careful not to jostle the pieces around much as I drove but that layout is built like a tank and suffered no damage along the way.
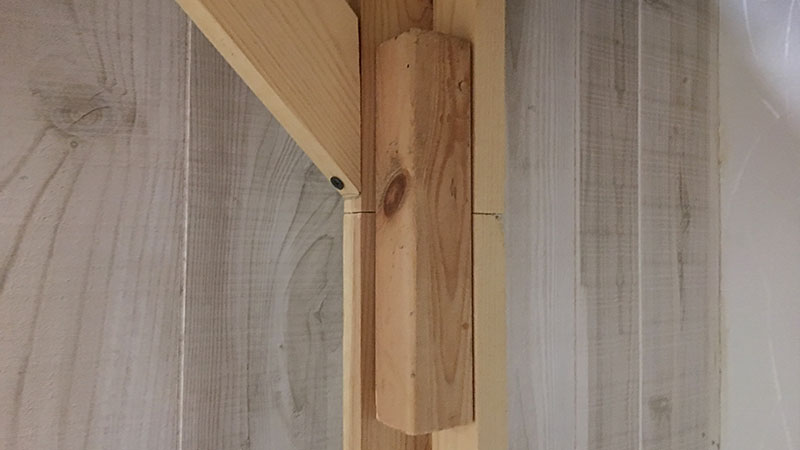
Once it arrived in it's new location I, with the help of my father, moved it into the basement. (which was a breeze thanks to more than 50 years of human progress on basement design) I then carefully re-attached the backdrop and re-attached the legs securing them in place using short lengths of 2x2 wood and a few drywall screws.

So in the end, how did moving a model railroad go? After years of planning and months of worrying, was it a success? Well, there were no garbage cans full of plaster and ground foam. No crowbars. There WAS a circular saw though and while I was sawing away at my precious layout and sawdust was flying, for the briefest of moments I thought to myself "It's just not worth the effort."
But that moment passed quickly enough...
...By the way, if you are interested in a wonderful little investment property in West Peoria, Illinois, boy have I got a deal for you!
No comments:
Post a Comment